Thursday 22 October 2020

SAP FIORI standard application extension part II

  • In Eclipse, create a new project select File->New->Project. Select SAPUI5 Application Development ->Application Project and Click Next. 
  • Uncheck the Create an Initial View check box and click finish.
  • To import source code of standard app, right click on the web content folder of the project, click on Import. 
  • In the dialog box that appears, click on File System and click next. 
  • Now browse for the folder in which downloaded source code is present, select it and click on Finish to import it into the project.
  • The source code is now present in the project.

To hide or modify an element, we need to figure out the corresponding ID of the element from the views. The extension points details in description of the app in FIORI app library can help get an idea of the location view of the element. The form in which field is to be added as well as pricing conditions table is present in the POItem view. 


  • Now to make any changes to the standard app, we should always create the extension project as directly modifying the source code is not a good practice.
  • Right click on the original project containing the source code create in above steps and then click on SAP Fiori Extension Project.
  • Create a New extension project and give it a name preferably starting with Z.


Wednesday 21 October 2020

SAP FIORI standard application extension part I

In this tutorial we will learn how to extend the SAP Fiori standard application and the steps for app extension are as follows:

The implementation and extensibility information of every standard app is provided in the FIORI apps library. We can check the name of BSP application and the extension points listed in the application information provided on the FIORI app library.


Check LPD_CUST Role and SAPUI5 application name under Technical configuration section.


On the SAP system, execute transaction LPD_CUST for Launchpad application details.
Search the LPD_CUST value for the application noted earlier in previous step and double click on the searched selected line containing app info.


Double click on Track Purchase Order, the application to be extended and make a note of the URL value specified in the Application Parameter section.


Now download the source code of the application, go to transaction SE38 and execute the program /UI5/UI5_REPOSITORY_LOAD. Specify the UI5 name for the application, select the download radio button and execute the program. Scroll to bottom and click on the download link to export the source code of the application.


SAP FIORI Types of Extensions

FIORI User Interface extensibility can help modify SAP Fiori standard applications as per customer’s needs without altering their source code.

To enable extensions, SAP has provided extension points in the standard code of the application which can be used to customize the apps.

There are four properties which can be used to extend the standard FIORI application– 
  • Sap.ui.viewExtensions: It provides custom view content at a specified extension in standard SAP delivered application. User can add new fields or images at extension points.
  • Sap.ui.viewModifications: This is used for overriding certain control properties of SAP-delivered application. The user can use it to modify, hide or show the existing element.
  • Sap.ui.viewReplacements:  This is used for replacing standard SAP-delivered view with custom view. User can use this property if there is no extension point provided and build a separate view with the required modifications.
  • Sap.ui.controllerExtensions: Replacing standard SAP-delivered application controller with custom controller. User can change the business logic using this property if required.

Tuesday 20 October 2020

Prerequisites for extension of standard SAP Fiori applications

  • Download and install eclipse IDE
  • Install SAP Plugins on Eclipse using the link https://tools.hana.ondemand.com/version -name. 
  • For eclipse versions newer than Juno the toolkit might not install due to Graphiti version error. To resolve this error install Graphiti from https://tools.hana.ondemand.com/juno and then install the toolkit
  • Check for installations before proceeding.
  • Open eclipse and go to Help -> About Eclipse and then click on Installations details to check all installed plugins.


Friday 16 October 2020

How to create HTML5 Module SAP Cloud Foundry

In this tutorial we will explain how to create and run the HTML5 module within a MTA project in SAP Cloud Foundry environment.  

  • Open Web IDE for trial account and right click on the workspace root folder.
  • Choose "New" and click on "Project from Template"

  • Pop up with Template Selection screen appears, select Multi Target Application project and choose Next.

  • Enter the Project Name and choose Next.


  • Enter the description and select the check box for "Use HTML5 Application Repository", press next and click finish. It will create the MTA project with a name "HTML5_tutorial".

  • Right click on the MTA project and choose "New" and then select "HTML5 Module".

  • Template selection pop will appear, select SAP UI5 Application and click on Next button.

  • Enter SAP UI5 Application name in the Module Name field and enter demo.ui in the Namespace field and click next.

  • Select XML from the View Type dropdown and enter the View Name as "First View" and press next and finish.


  • It will create the UI5 application with the name "HTML5App" in HTML5 module. In the View folder open the FirstView.view.xml file and create the text element in the content as per below screenshot and save the changes.

  • We have created our first sample Hello World UI5 application. To test the application right click on the created UI5 application "HTML5App" and choose "Run" and then "Run as Web Application". A pop will appear to choose the file to run, select the index.html file and press OK


  • It will open up the new browser tab displaying "Hello World" text.

Thursday 15 October 2020

10 Seconds to create and deploy sample Node.js application SAP Cloud Foundry

In this tutorial we will learn how to create and deploy the sample Node.js application on SAP Cloud Foundry. Follow the below mentioned steps to create your first Node.js module in 10 seconds.

Create the MTA project, refer below mentioned blog for details.

SAP Cloud Foundry MTA project

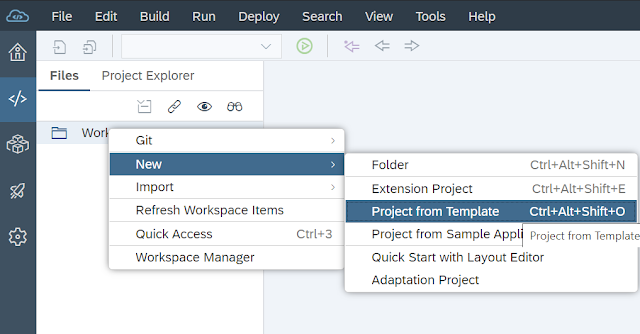
  • Now we will create the Node.js module. Right click on the MTA project folder and choose "New" and select  "Node.js Module".


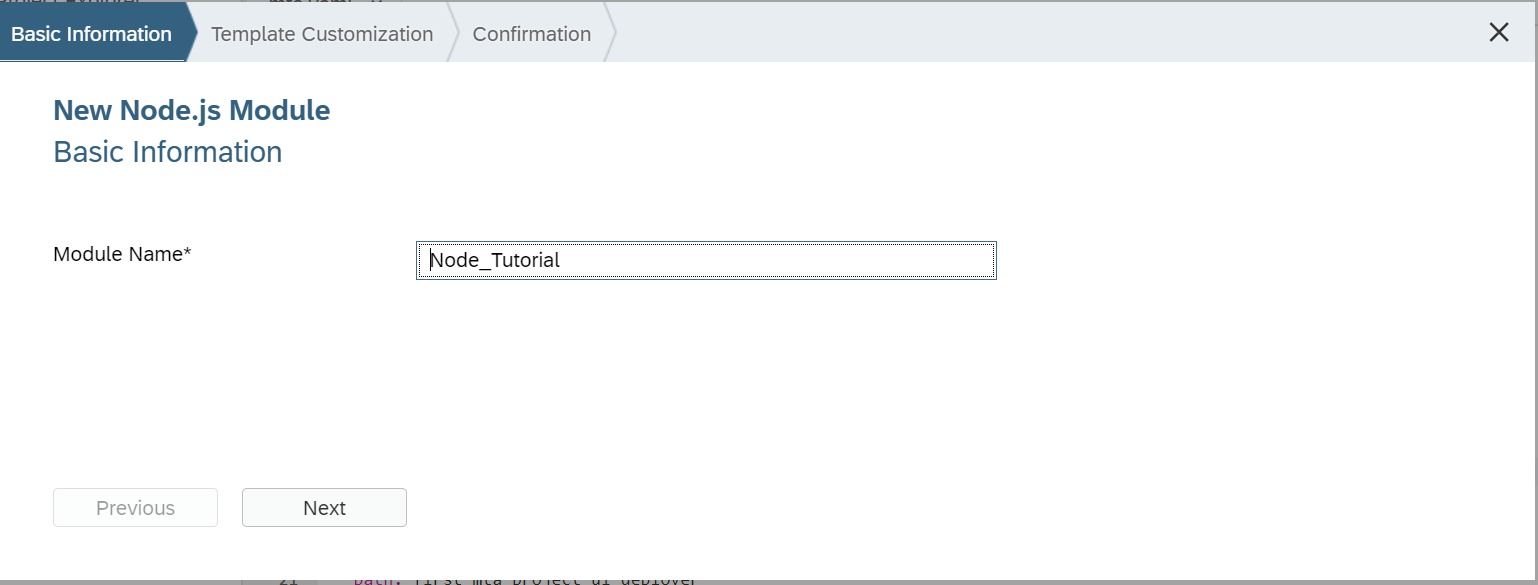
  • Enter the Module Name and press Next.


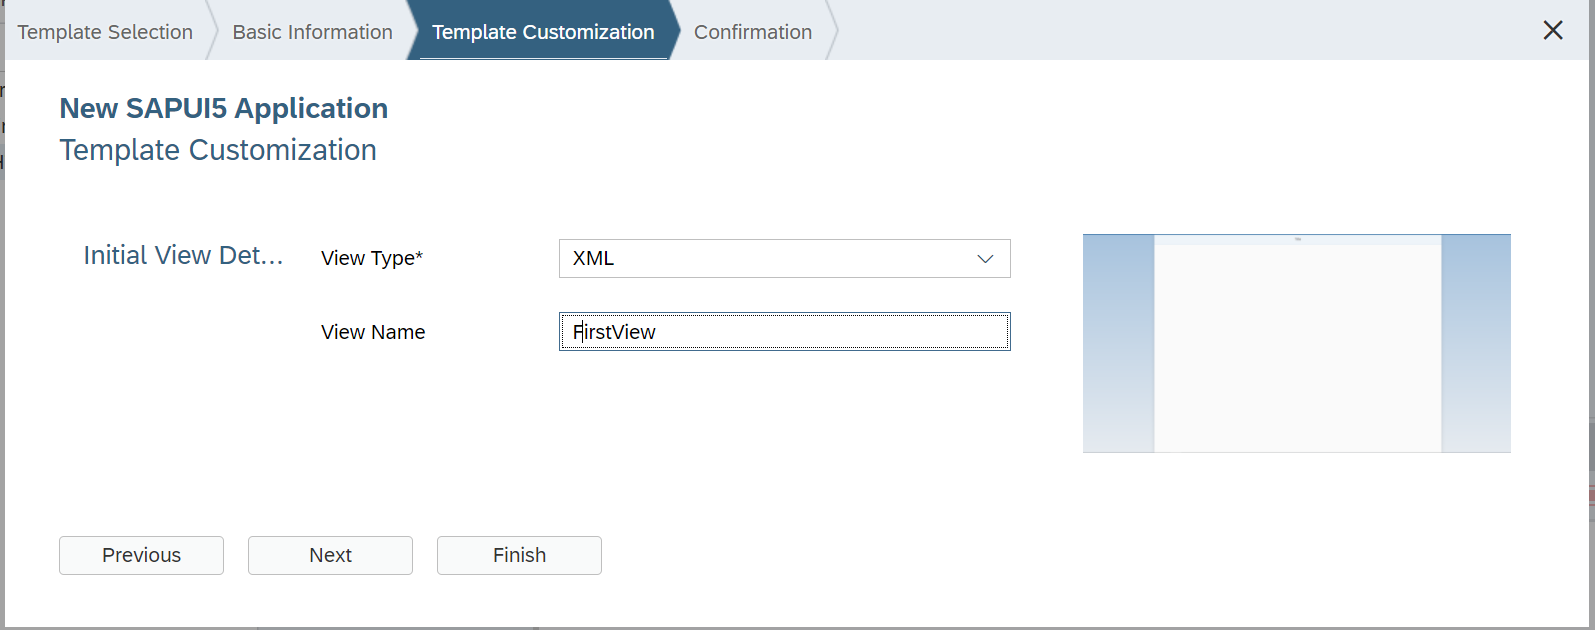
  • It will specify the version as "1.0.0" and Main JS file as "server.js". Enter the description and press Next and finish.


We can see that Node Module folder is created within the MTA project. Open the project.json file and provide the express dependency with version as "^4.0.0". We will be using express framework in node application that provides a robust set of features for web and mobile applications.

"dependencies": {
  "express": "^4.0.0"
  }, 


Within the Node Module folder we have server.js file which is the starting point of the application. In this file we will do the configuration so that application will start listening to the server ports and give the response back to the client requests.

"use strict";
const express = require('express');
const app = express();
var port = process.env.PORT || 3000;

app.get('/', function (req, res) {
 res.send("Hello World\n");
});
app.listen(port);

console.log("Server listening on port %d", port); 


We have successfully created our first Node.js application. Now to run the application, right click on the Node Module folder, choose "Run" and click on the "Run as Node.js application". It will build task for npm install and run the application.

Nodejs build task "npm install" started
Service provisioning started
Service provisioning finished
Nodejs build task "npm install" finished successfully
Application is starting
Application is running
> Node_Tutorial@1.0.0 start /home/vcap/app
> node server.js
Server listening on port 3000

It will also generate the URL so that we can test the application in the browser or use it as REST API in any application.

 
We might face error while running the Node.js module in case the cloud foundry setting are not configured for the account endpoints. 

Request failed: error URI: /di/runner/run?project=/first_mta_project/Node_Tutorial
Unable to run module.
Running module /first_mta_project/Node_Tutorial failed. See console logs for more details. Request failed: error URI: /di/runner/run?project=/first_mta_project/Node_Tutorial

Follow below mentioned steps resolve the error.
  • Click on the settings icon in the left hand side panel and select "Cloud Foundry" from Workspace Preferences.
  • Go to trial account home page in cockpit to check the API endpoints and the select the corresponding API from the dropdown.
  • It will ask for Email Id and Password and on successful authentication, it will populate the Organization and and Space.
  • Click Save and re run the Node.js application.


How to create first MTA project SAP Cloud Foundry

In this tutorial we will explain how to create your first MTA project in SAP Cloud Foundry environment.

Open the SAP Web IDE for SAP HANA: 
  • Access the SAP Cloud Platform Cockpit at https:// account.hanatrial.ondemand.com/cockpit.
  • Enter your SAP Cloud Platform e-mail and password. 
  • Launch SAP Web IDE from the subscriptions.
  • You can also bookmark or save the Web IDE link for future reference.
Once web IDE is launched, Right-click on the workspace folder and choose New then click on Project from Template. 


  • It will Pop up the Template Selection screen, select environment as Cloud Foundry.

  • Select the Multi-Target Application Project from template selection and press "Next" button.


  • Enter the Project Name and press "Next" button.

  • It will by default mention the Application Version as 0.0.1, enter the MTA project description and click on the check box to "Use HTML5 Application Repository". 
  • This is required because the SAP Fiori launchpad solution stores static resources in the HTML5 repository. Press Next and then click on finish to create the MTA project.

  • In the MTA project folder open the "mta.yaml" file and check the content. It will open up the mta.yaml in MTA editor which can help you to see the content in the UI layout interface. We can also click on the Code Editor to review the content in the form of code editor.


Wednesday 14 October 2020

How to create and set up SAP Cloud Foundry trial account

 In this tutorial we will learn how to create and set up SAP Cloud Foundry trial account.

  • A pop will appear with Cloud Foundry details scroll to the bottom and choose "Register For Free"

  • Follow the given instructions and create the new trial account, once your account is created you will be able to access the SAP Cloud Platform Cockpit at HANA account cockpit
  • To Create a trial account, choose the trial account home page and Enter your trial account.


  • Set up process for trial account will continue and Region, Global Account, Subaccount, Org, Space will be assigned.


Happy Learning. Thank You for reading, please share and subscribe :) 

Set Up SAP Web IDE for SAP HANA and Node.js artifacts

In this tutorial we will learn how to set up SAP Web IDE for SAP HANA and Node.js artifacts. Follow below mentioned steps to configure the SAP Web IDE -
  • Click on settings icon in the left hand side menu panel in Web IDE.
  • Go to workspace preferences and choose Extensions. 
  • Search for Tools for SAP HANA Database Development, turn the switch to On.
  • Search for Tools for Node.js Development, turn the switch to On.
  • Search for SAP HANA Database Explorer, turn the switch to On.
  • Choose Save to configure the changes. It will automatically refreshes the SAP Web IDE window to changes to reflect.
Happy Learning. Thank You for reading, please share and subscribe :) 

Tuesday 13 October 2020

SAP FIORI Launchpad Customization : Custom Logo and Background image

In this tutorial we will learn how to customize FIORI Launchpad login page. We can add custom and user defined background image and logo through custom ABAP class. 


In order to upload the custom image to SAP system and replace the default logon page SAP image follow the below mentioned steps. 
  • Go to transaction SE80.
  • Click on MIME repository.
  • Navigate to image using path - Sap > public > bc > ui2 > logon > image. 
  • Right click on Image folder and click on “Import MIME objects”
  • Import the image that you want to put as logo in the Launchpad login page.


Imported images will be added to the images node. 

Once images are uploaded create a custom class "ZCL_SRA_LOGIN" which is copy of standard class /UI2/CL_SRA_LOGIN. 

Inside method INIT_DEFAULT_PROPERTIES make changes in the code and below mentioned properties "img_background", "img_background_mobile" and "img_background_mobile_land" so that it points to images we have uploaded in the mime repository. 

set_property( iv_name = 'img_background' iv_value = '/sap/public/bc/ui2/logon/img/custom_login.jpg').
set_property( iv_name = 'img_background_mobile' iv_value = '/sap/public/bc/ui2/logon/img/custom_login_mobile.jpg').
set_property( iv_name = 'img_background_mobile_land' iv_value = '/sap/public/bc/ui2/logon/img/custom_logo.jpg').

  • Now go to SICF transaction and navigate to default_host > sap > bc > ui5_ui5 > ui2 > ushell
  • Under Error Pages tab click on Configuration Button at the bottom of the screen and change the ABAP class to ZCL_SRA_LOGIN and maintain the client as well. After making the changes, close the pop up by clicking on the tick icon and save the changes by clicking on save button.


Similarly Go to SICF transaction. Follow the path as mentioned below: 

default_host > sap > bc > flp. 

  • Under Error Pages tab choose the System logon radio button instead of the default Explicit Response Time Radio button. 
  • Click on configuration button and make the following changes in the pop up. Maintain the Z class name "ZCL_SRA_LOGIN" here as well.


We can see the custom logo at the bottom coming through custom class.


Wednesday 7 October 2020

Folder Structure SAP UI5 application

Folder structure for SAP UI5 application should contain index.html, manifest.json and Component.js file in the root folder.